WebSocket
Many of the new possibilities brought by the sketch package rely on the use of WebSocket. WebSocket is used to create a new graphics device for real-time plotting in R; it is also used to create an R-scriptable environment so that one can control a user-defined browser session with R commands.
To use WebSocket in your sketch application, you have to include #! load_library("websocket") in the header of the file, then follow the steps below.
1. Start a WebSocket server#
Start the WebSocket server with:
2. Start your sketch application#
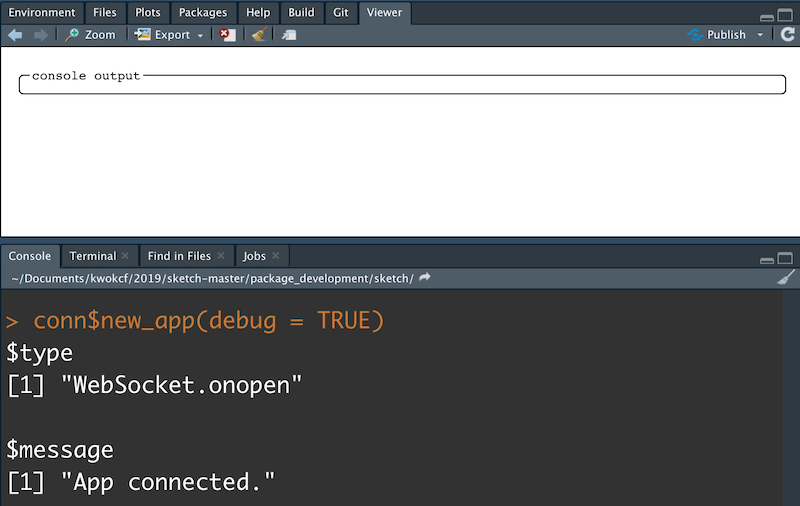
Start your sketch application with the source_r call. For illustration purposes, we will use a sample app provided by the new_app() method:
When the connection is established, a message will show at the R console.
Screenshot#
3a. Control the browser#
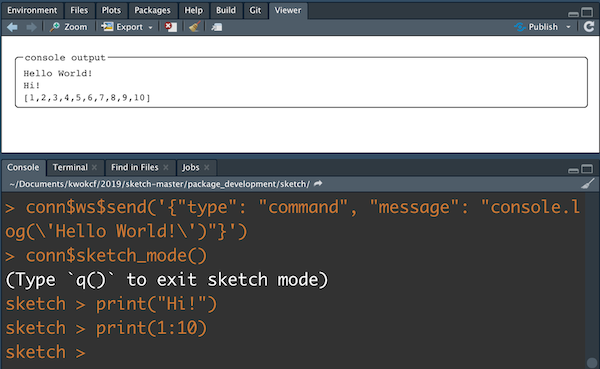
Now you can control the browser session using the conn$ws$send function. The message to be sent to the browser must be a JSON string (to be processed by your application). In the sample app, by default it can accept a string of the form {"type": "command", "message": "YOUR COMMAND"}. For example, to ask the browser to print the "Hello World!" string, use
Alternatively, it is more convenient to wrap the above into a function call.
Screenshot#

3b. Control the browser using sketch mode#
In the above, the command sent to the browser was written in JavaScript. Since sketch is an R-to-JavaScript transpiler, it is possible to write R commands instead. This functionality is provided by conn$sketch_mode() which transpiles R commands into JavaScript ones and sends them out to the browser session.
Screenshot#
4. Stop the WebSocket server#
When you finish with the session, use conn$stopServer() to close the connection.